7 minutes
Using B2 as a Backend for Terraform
This post is part of the Homelab Repo and Homelab series.
In the previous post, I talked about how I use a single repository to manage my homelab. I also set up a devcontainer to make it easier to work on the project. In this post, I am going to set up OpenTofu as our terraform provisioning tool, tied into a Backblaze B2 bucket as our backend. This will allow to manage my homelab through terraform and keep the state synced to the cloud.
Why OpenTofu?
The standard in the infrastructure as code space has long been Terraform, maintained by Hashicorp. I however have decided to go with OpenTofu as my terraform provisioning tool. OpenTofu is a fork of Terraform that was spun up when Hashicorp decided to change the license of Terraform. This license move was aimed at restricting the use of Terraform to build a SaaS product that would compete with Hashicorp’s own offerings. While the licensing change is unlikely to impact most users directly, I am an advocate for open source software and believe that the more people that can use and develop the software, the better. It may also start to indirectly impact users as it can no longer be used in various DevOps pipelines.
OpenTofu is completely open source, and a drop in replacement for Terraform v1.6.
Adding Terraform to the Repo
The first step is to add an area in the repo for terraform. I have created a new directory called infrastructure to contain Terraform, Ansible and DNSControl. To this I have added a terraform directory. In this directory I have added a terraform.tf file, this file will contain the core configuration including the backend and providers.
homelab/
├── infrastructure/
│   ├── terraform/
│   │   ├── terraform.tf
In this file I have added the basic configuration for terraform:
terraform {
  required_version = ">= 1.0.0"
}
Adding the Backend
Create the B2 Bucket
In order to use B2 as our backend, we need to create a bucket that tofu can use. I have chosen to do this through the B2 console, as I prefer to keep IaC dependencies out of the IaC codebase. As bucket names need to be globally unique, you will need to choose a name that makes sense to you. I have chosen to combine my homelab name with tf-backend to create the bucket name.
In the B2 Console, go to the Buckets section and click Create Bucket.
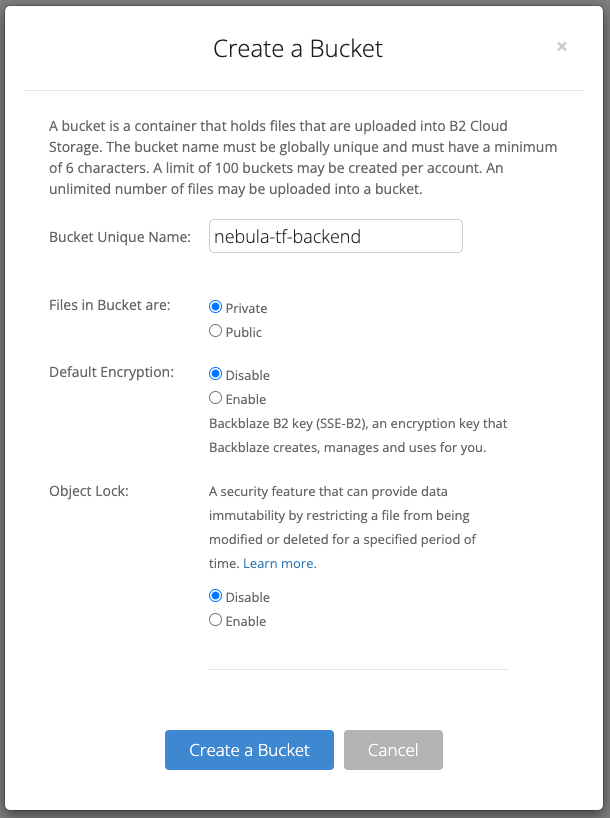
Here there are a few options:
| Option | Description | My Choice |
|---|---|---|
| Bucket Unique Name | The name of the bucket that is globally unique. | nebula-tf-backend |
| Files in Bucket are | This sets the access method for files in the bucket. Public allows file downloads without authentication, while Private requires authentication. | Private |
| Default Encryption | This allows you to enable Backblaze provided encryption of the bucket contents. | Disable |
| Object Lock | This allows you to enable object lock on the bucket. Object lock is a feature that allows you to prevent objects from being deleted or overwritten. | Disable |
Once you have created the bucket, you will need to create an application key. This is done through the B2 Console, go to the Application Keys section and click Add a New Application Key.
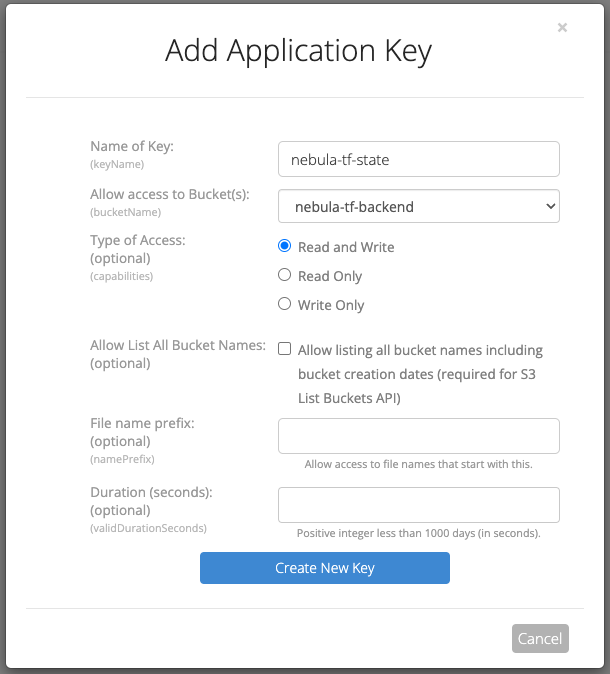
We will need an application key to to push our state file to the bucket. You could use the Master Application Key, however I prefer to restrict this key to only the state bucket. It has the following options:
| Option | Description | My Choice |
|---|---|---|
| Name | The name of the application key. | nebula-tf-state |
| Access to Bucket | The bucket or buckets that the key will have access to. | nebula-tf-backend |
| Type of Access | The permissions for the application key. | Read/Write |
| Allow List of All Buckets | The capabilities for the key to list all buckets, even those it doesn’t have access to | false |
| File Name Prefix | The prefix for files in the bucket the key has access to. | |
| Duration | The duration in seconds that the key is valid for. |
Add environment variables
Now we have the application key, we need a way for terraform to use it. Environment variables are the easiest and most secure way to do this. As such, at the root of the repo I have added a new file called .env.1password. This is an intermediary file that contains the environment variables for the repo, along with their 1Password lookup location.
homelab/
├── .env.1password
├── .env
This can then be used to generate a second file called .env which contains the actual environment variables. This file is not included in the repo, as it contains secrets. As we want to ensure that this file is never committed to the repo, we need to add it to the .gitignore file. If you are using another secret management tool, you will need to add these variable in another way.
You will need two environment variables, AWS_ACCESS_KEY_ID and AWS_SECRET_ACCESS_KEY. These are the credentials that terraform (and tofu) use for the s3 backend.
export AWS_ACCESS_KEY_ID="op://Homelab/Tofu Backend API Key/username"
export AWS_SECRET_ACCESS_KEY="op://Homelab/Tofu Backend API Key/credential"
In this example, we are loading the credentials from an item called Tofu Backend API Key in the Homelab vault.
Next up I am going to add a command to our justfile to generate the .env file from the .env.1password file.
build-env:
    op inject -i .env.1password -o .env
We can now run the following command to generate the .env file, then source it so the environment variables are available to the shell:
just build-env
source .env
Adding the Backend to the Terraform Configuration
Now we have the environment variables, we can add the backend to the terraform configuration. In the terraform.tf file, add the following:
terraform {
  backend "s3" {
    bucket = "nebula-tf-backend"
    key = "homelab.tfstate"
    region = "eu-central-003"
    endpoint = "s3.eu-central-003.backblazeb2.com"

    skip_requesting_account_id = true
    skip_credentials_validation = true
    skip_metadata_api_check = true
    skip_region_validation = true
    skip_s3_checksum = true
  }
}
The bucket variable is the name of the bucket we created earlier. You can find your endpoint URL in the Bucket details section of the B2 Console. The region can be any string, as it is not used when using the endpoint setting, but I like to set it the region of the endpoint. Finally, the key is the name of the state file to use. This would allow you to have multiple state files in the same bucket, however I only have one for now.
Initialising Terraform
The final step is to initialise the terraform configuration. This is done with the following command from the infrastructure/terraform directory:
tofu init
This will create a local set of files including a .terraform directory and a .terraform.lock.hcl file. We only need to commit the .terraform.lock.hcl file to the repo, so we can add the following to the .gitignore file:
# ----- Terraform -----
# Local .terraform directories
**/.terraform/*

# .tfstate files
*.tfstate
*.tfstate.*

# Crash log files
crash.log
crash.*.log

# Exclude all .tfvars files, which are likely to contain sensitive data, such as
# password, private keys, and other secrets. These should not be part of version
# control as they are data points which are potentially sensitive and subject
# to change depending on the environment.
*.tfvars
*.tfvars.json

# Ignore override files as they are usually used to override resources locally and so
# are not checked in
override.tf
override.tf.json
*_override.tf
*_override.tf.json

# Ignore transient lock info files created by terraform apply
.terraform.tfstate.lock.info

# Include override files you do wish to add to version control using negated pattern
# !example_override.tf

# Include tfplan files to ignore the plan output of command: terraform plan -out=tfplan
# example: *tfplan*

# Ignore CLI configuration files
.terraformrc
terraform.rc
Conclusion
You will now have a working terraform configuration that is using the S3 backend to store the state file in a B2 bucket. Until you add resources, no state file will be uploaded to the bucket. Once you add resources, a simple tofu apply will create the resources and store the new state file in the bucket. It’s important to note that we haven’t added file locking to the backend. This is primarily because this is my homelab and I am the only person who will be managing it, so I don’t need to worry about multiple people editing the same state file at the same time. If you are using this in a multi-user environment, you will need to add file locking to the backend.